Noel

Independent game designer and programmer. Created Subterfuge, Casey's Contraptions, Flower Garden. Runner. Cyclist. Nature enthusiast. Magic addict. @noel_llopis.

Indie Project Management For One: Tools

I’ve been making computer games in some form or another for just over 25 years now. At the very beginning, as a hobby (passion) and completely by myself (although not for lack of trying to get some of my friends involved). In the late 90s, when I finally left academia and started making games professionally, teams were still relatively small, with a total of around 10-15 people per team. As we all know, budgets and scopes kept growing, and so did team sizes. At its peak, the largest team I worked at had around 200 people. That’s when I decided to go indie and started Power of Two Games, which was obviously just two of us. Finally, now as Snappy Touch, I’ve gone full circle: It’s just me again.

gears.jpgDevelopment tools and hardware have changed quite a bit from the times I was writing in straight Z80 assembly and saving the programs to a tape. But I’ve also changed and learned a lot during all those years developing games, and even though I’m writing games by myself again, I’m doing things very differently from how I did them back at the start.

One thing that I’ve always done is to question everything. Why should I do things a certain way? Why is that the “accepted” way of doing something? And not surprisingly, at each step of the way, I’ve changed my development style to match my situation (often in ways that went against the “common wisdom”).

When it comes to solo development, I rely heavily on the concept of goals and iterations at multiple levels:

  • Immediate (< 1 minute): Prioritizing the ideas going through my mind. Writing tests. Writing code.
  • Short Range (< few hours): Tasks that move the project forward in some way.
  • Mid Range (< 2 weeks): “Stories” that define a self-contained, significant part of the project.
  • Long Range (full project, several months): Ship date, beta testing, etc.

It turns out, I use a different set of tools to help me manage the items at each level of the development cycle.

Immediate

These are the actions I take and complete in less than a minute or two. Most of them are writing tests (with UnitTest++, of course), writing code to make those tests pass, refactor code, and check it into Subversion. I have my Subversion repository hosted on Dreamhost and I access it through SSH so it’s secure, accessible from anywhere with an internet connection (or 3G signal and HandyLight), offsite, and easy to backup. And because Subversion works great offline (unlike Perforce), it’s not a problem to work without connection to the repository for a while.

I also need to manage my minute-to-minute thoughts, write down ideas and reprioritize them when the time comes. When I’m “in the zone”, I get way more ideas than I can execute with my fingers: This function needs to be moved to a different file, I really should be compacting that data over there, who was stupid enough to name this file this way?, that variable shouldn’t be cached, etc. If I don’t write things down, I will either forget them, or I’ll stress for hours until I finally get around to doing them. I could also do things as I think about them, but then I would be chasing a rabbit down a neverending hole and wouldn’t get any work done (I’m sure anybody who’s gotten lost browsing web pages can identify with that).

I used to do this the old-fashioned way, simply with paper and pencil (like Bob described in his blog post). However, I found that physical paper and pencil was just too limiting: I can type a lot faster than I can write, switching to writing requires moving away from the keyboard, and, most importantly, I need to bring the notes with me everywhere and it’s very difficult to rearrange, sort, or coalesce them in any way.

So instead, my tool of choice these days is JustNotes. It’s perfect for jotting down thoughts in a matter of seconds without even interrupting my train of thought. I have JustNotes bound to a global key, so in the middle of typing a line of code, I can press that key, enter whatever I’m thinking about, press the key again, and finish the line of code. All in 4-5 seconds. Don’t laugh: The fact that I can do that in just a few seconds without moving my hands away from the keyboard means I can use it any time without much penalty. It’s amazing how many things I jot down that I wouldn’t do otherwise.

Short Range

To manage tasks up to a few hours in length, I use Trac. Trac is a fantastic issue-tracking tool: It’s free, it’s fast, it’s simple, and it’s configurable. In the past I’ve used anything from spreadsheets, to Bugzilla, to publisher-owned bug databases, and nothing comes close to Trac for my needs. It also scales very well to teams of more than one person (although it might not be good enough for hundreds of people).

Just like Subversion, I have Trac hosted externally, through my web hosting company. Sometimes it’s frustrating if I need to access it and the server is down, but again, the convenience of having it off site makes it well-worth it.

Any task that requires more than 10-15 minutes goes in Trac, and then I can easily prioritize tasks depending on their importance. Usually, if an item has been on my instant queue in JustNotes for about a day and I haven’t gotten around to it, it either gets deleted or it gets moved into a full item in Trac. The only way progress happens is by ticking off Trac tasks. In the end, my projects live and die by Trac.

Medium Range

User stories (to borrow terminology from Scrum/XP) are visible, relatively self-contained features of the final project. They’re made up of several tasks, and usually take a few days to a few weeks to implement. A group of user stories make up a full iteration (sprint) of the game, which is usually between one and two weeks long. Sometimes user stories are complex enough (add a replay feature visible on the web site) that the full iteration is just the one user story.

I keep track of these stories in Trac as well. Trac is both an issue-tracking system and a wiki, so the wiki part is perfect to keep these user stories. In addition to that, I label tasks as belonging o a particular iteration. That allows me to separate what needs to be done for this iteration, from other tasks that I added for the future. At the start of each iteration, I decide on the user stories and either generate new tasks or label existing tasks as due for this iteration.

The wiki in Trac is extremely valuable for all sorts of other things: game design ideas, general brainstorming, gathering reference material, etc.

Trac ends up being the perfect mid-range vision of my project.

Long Range

User stories and tasks in Trac aren’t enough to cover a project that is potentially 3-4 months long. I need something that helps me with the longer view, otherwise I find that things creep up on me without realizing it because I’m so focused on the short and mid-range items.

The best tool I’ve found so far is very low-tech: A printable month-per-page calendar covering the full length of the project. Right now I’m shooting for a November release of my current project, so I printed August, September, October, and November and pinned them to the corkboard on my office. It’s amazing the sense of urgency that seeing your ship date gives you. You realize that you only have a handful of weeks before shipping and makes it much easier to prioritize tasks (and chop off features or save them for an update).

I realize this long-term, calendar view isn’t very useful if you don’t have a set release date and you want to continue chipping at your game until it’s ready. But even if your release date is flexible, having this long-term view can help you keep budgets in perspective and manage them accordingly.

Finally, for an extra bit of motivation (or maybe this falls in the category of excessive pressure), I just started using a countdown widget for the Mac OS Dashboard. Just in case the calendar view wasn’t enough, here’s a countdown (down to the second) of the time left until release.

countdown.png

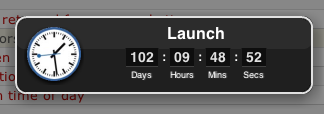
Speaking of which, I think it’s time I get back to work. Only 102 days left!

IAP Bundles: More Than Just Good Deals

fg_bundles.jpg
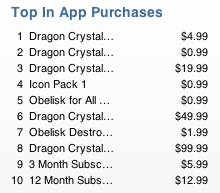
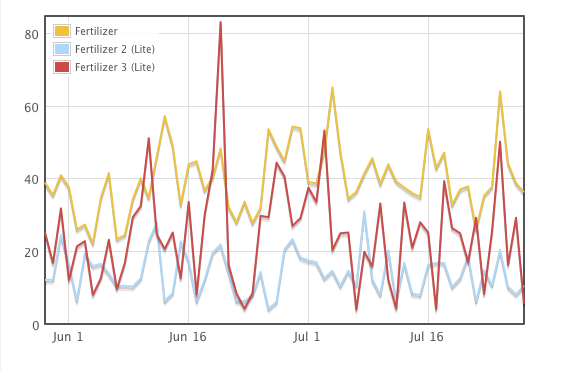
In-game point bundles are nothing new. Even before the time of in-app purchases, Zynga was famous for releasing “points” apps to increase your game reputation or other stats. The fact that they released not just one way of getting points, but many different apps at different price points, was something I dismissed as a marketing tactic to try to get noticed on the charts.

Fast-forward to now, and as more companies are jumping into the bandwagon of games that need “points” to make progress, we’re still bundles. Again, I chucked that up to legacy reasons and doing what worked with the standalone apps.

Discovering Bundles

It was at the last 360iDev in San Jose, that Mark Johnson said something that really stuck with me. I can still hear him say it with his fine British accent: “I think we might be underestimating how much people are willing to pay for in-app purchases”. Really?

As soon as I had a chance, I looked at the best-selling IAPs for some popular games. The screenshots below were taken today, not back when I looked at them, but the results are very much the same. I let you guess which games these IAPs came from.

werule.pngwefarm.pngcastlecraft.pngfarmville.png

I was very surprised with what I saw. The top-selling IAP was never a $0.99 one, and there were bundles of $49.99 or higher towards the top! That was crazy! I was indeed underestimating what players are willing to buy by only offering a measly $0.99 fertilizer bottle in Flower Garden!

Bundles In Flower Garden

As part of the next Flower Garden update, I decided to run a little experiment and add two more fertilizer options: A $2.99 one and a $5.99 one, each of them giving you a slightly better deal on fertilizer (20, 70, and 150 doses). That was still nothing compared to the price tags I was seeing in those other games, but I didn’t want to alienate users by slapping some ridiculously high bundle prices.

The results?

The most popular item by number of sales was still the single fertilizer bottle for $0.99. But a lot of people took advantage of the the other two bundles as well. This is how fertilizer sales for Flower Garden Free have been for the last two months:

fertilizer_sales.png

But now, let’s look at that same period by plotting revenue (again, only Flower Garden Free, the full version is very similar but it wasn’t easy to combine the two to display them here):

fertilizer_revenue.png

Now the two bundles are a lot closer to the single bottle, especially the larger, $5.99 bundle.

More Than Meets The Eye

In the end, were bundles effective, or are people buying the same amount of fertilizer and leaving less money in the process? Unfortunately I can’t answer that question from a pure data point of view. Looking at fertilizer sales before and after I introduced the bundles is no good because the number of users increased dramatically at each update. I can’t even normalize them by the number of sales, it would have to be by the number of daily users, and unfortunately that’s not a statistic that I’m tracking.

However, I think we can argue two really good points about why bundles are great.

1. More choice

Having different levels of bundles give players more choice on how they want to purchase something. From what I’ve read about buyer psychology, people love having choices when buying something (just don’t give them too many choices!). They are more involved in the buying process, they evaluate it, and they feel better about the decision they eventually make. So that seems to indicate that more people might buy fertilizer if there are a few bundle options than if there’s only one.

2. Commitment

This is the biggie. Whenever a user purchases a $5.99 bundle (or a $49.99 one!), they became more committed to your game. You can also guarantee they will come back again to get their money’s worth from that purchase. Even if they had the intention of coming back to your game without the purchase, having spent that money is a nice reminder to do so. And having people come back to your game is what this is all about: They will explore more of the game, get hooked more, make more in-app purchases, show it to more of their friends, and send more bouquets to their family.

I have no doubt that I’ll be using bundles in the future. Players get a good deal, and you get committed players. It’s a win-win situation.

This post is part of iDevBlogADay, a group of indie iPhone development blogs featuring two posts per day. You can keep up with iDevBlogADay through the web site, RSS feed, or Twitter.

Mock Objects: Friends Or Foes?

In a previous article we covered all the details necessary to start using unit testing on a real-world project. That was enough knowledge to get started and tackle just about any codebase. Eventually you might have found yourself doing a lot of typing, writing redundant tests, or having a frustrating time interfacing with some libraries and still trying to write unit tests. Mock objects are the final piece in your toolkit that allow you to test like a pro in just about any codebase.

Testing Code

The purpose of writing unit tests is to verify the code does what it’s supposed to do. How exactly do we go about checking that? It depends on what the code under test does. There are three main things we can test for when writing unit tests:

  • Return values. This is the easiest thing to test. We call a function and verify that the return value is what we expect. It can be a simple boolean, or maybe it’s a number resulting from a complex calculation. Either way, it’s simple and easy to test. it doesn’t get any better than this.
  • Modified data. Some functions will modify data as a result of being called (for example, filling out a vertex buffer with particle data). Testing this data can be straightforward as long as the outputs are clearly defined. If the function changes data in some global location, then it can be more complicated to test it or even find all the possible places that can be changed. Whenever possible, pass the address of the data to be modified as an input parameter to the functions. That will make them easier to understand and test.
  • Object interaction. This is the hardest effect to test. Sometimes calling a function doesn’t return anything or modify any external data directly, and it instead interacts with other objects. We want to test that the interaction happened in the order we expected and with the parameters we expected.

Testing the first two cases is relatively simple, and there’s nothing you need to do beyond what a basic unit testing-framework provides. Call the function and verify values with a CHECK statement. Done. However, testing that an object “talks” with other objects in the correct way is much trickier. That’s what we’ll concentrate on for the rest of the article.

As a side note, when we talk about object interaction, it simply refers to parts of the code calling functions or sending messages to other parts of the code. It doesn’t necessarily imply real objects. Everything we cover here applies as well to plain functions calling other functions.

Before we go any further, let’s look at a simple example of object interaction. We have a game entity factory and we want to test that the function CreateGameEntity() finds the entity template in the dictionary and calls CreateMesh() once per each mesh.

TEST(CreateGameEntityCallsCreateMeshForEachMesh)
{
    EntityDictionary dict;
    MeshFactory meshFactory;
    GameEntityFactory gameFactory(dict, meshFactory);

    Entity* entity = gameFactory.CreateGameEntity(gameEntityUid);
    // How do we test it called the correct functions?
}

We can write a test like the one above, but after we call the function CreateGameEntity(), how do we test the right functions were called in response? We can try testing for their results. For example, we could check that the returned entity has the correct number of meshes, but that relies on the mesh factory working correctly, which we’ve probably tested elsewhere, so we’re testing things multiple times. It also means that it needs to physically create some meshes, which can be time consuming or just need more resources than we want for a unit test. Remember that these are unit tests, so we really want to minimize the amount of code that is under test at any one time. Here we only want to test that the entity factory does the right thing, not that the dictionary or the mesh factory work.

Introducing Mocks

To test interactions between objects, we need something that sits between those objects and intercepts all the function calls we care about. At the same time, we want to make sure that the code under test doesn’t need to be changed just to be able to write tests, so this new object needs to look just like the objects the code expects to communicate with.

A mock object is an object that presents the same interface as some other object in the system, but whose only goal is to attach to the code under test and record function calls. This mock object can then be inspected by the test code to verify all the communication happened correctly.

TEST(CreateGameEntityCallsCreateMeshForEachMesh)
{
    MockEntityDictionary dict;
    MockMeshFactory meshFactory;
    GameEntityFactory gameFactory(dict, meshFactory);

dict.meshCount = 3;

    Entity* entity = gameFactory.CreateGameEntity(gameEntityUid);

    CHECK_EQUAL(1, dict.getEntityInfoCallCount);
    CHECK_EQUAL(gameEntityUid, dict.lastEntityUidPassed);
    CHECK_EQUAL(3, meshFactory.createMeshCallCount);
}

This code shows how a mock object helps us test our game entity factory. Notice how there are no real MeshFactory or EntityDictionary objects. Those have been removed from the test completely and replaced with mock versions. Because those mock objects implement the same interface as the objects they’re standing for, the GameEntityFactory doesn’t know that it’s being tested and goes about business as usual.

Here are the mock objects themselves:

struct MockEntityDictionary : public IEntityDictionary
{
    MockEntityDictionary() 
        : meshCount(0)
        , lastEntityUidPassed(0)
        , getEntityInfoCallCount(0)
    {}

    void GetEntityInfo(EntityInfo& info, int uid)
    {
        lastEntityUidPassed = uid;
        info.meshCount = meshCount;
        ++getEntityInfoCallCount;
    }

    int meshCount;
    int lastEntityUidPassed;
    int getEntityInfoCallCount;
};


struct MockMeshFactory : public IMeshFactory
{
    MockMeshFactory() : createMeshCallCount(0)
    {}

    Mesh* CreateMesh()
    {
        ++createMeshCallCount;
        return NULL;
    }
};

Notice that they do no real work; they’re just there for bookkeeping purposes. They count how many times functions are called, some parameters, and return whatever values you fed them ahead of time. The fact that we’re setting the meshCount in the dictionary to 3 is how we can then test that the mesh factory is called the correct number of times.

When developers talk about mock objects, they’ll often differentiate between mocks and fakes. Mocks are objects that stand in for a real object, and they are used to verify the interaction between objects. Fakes also stand in for real objects, but they’re there to remove dependencies or speed up tests. For example, you could have a fake object that stands in for the file system and provides data directly from memory, allowing tests to run very quickly and not depend on a particular file layout. All the techniques presented in this article apply both to mocks and fakes, it’s just how you use them that sets them apart from each other.

Mocking Frameworks

mock.jpgThe basics of mocking objects are as simple as what we’ve seen. Armed with that knowledge, you can go ahead and test all the object interactions in your code. However, I bet that you’re going to get tired quickly from all that typing every time you create a new mock. The bigger and more complex the object is, the more tedious the operation becomes. That’s where a mocking framework comes in.

A mocking framework lets you create mock objects in a more automated way, with less typing. Different frameworks use different syntax, but at the core they all have two parts to them:
A semi-automatic way of creating a mock object from an existing class or interface.
A way to set up the mock expectations. Expectations are the results you expect to happen as a result of the test: functions called in that object, the order of those calls, or the parameters passed to them.

Once the mock object has been created and its expectations set, you perform the rest of the unit test as usual. If the mock object didn’t receive the correct calls the way you specified in the expectations, the unit test is marked as failed. Otherwise the test passes and everything is good.

GoogleMock

GoogleMock is the free C++ mocking framework provided by Google. It takes a very straightforward implementation approach and offers a set of macros to easily create mocks for your classes, and set up expectations. Because you need to create mocks by hand, there’s still a fair amount of typing involved to create each mock, although they provide a Python script that can generate mocks automatically from from C++ classes. It still relies on your classes inheriting from a virtual interface to hook up the mock object to your code.

This code shows the game entity factory test written with GoogleMock. Keep in mind that in addition to the test code, you still need to create the mock object through the macros provided in the framework.

TEST(CreateGameEntityCallsCreateMeshForEachMesh) 
{
    MockEntityDictionary dict;
    MockMeshFactory meshFactory;
    GameEntityFactory gameFactory(dict, meshFactory);

    EXPECT_CALL(dict, GetEntityInfo())
        .Times(1)
        .WillOnce(Return(EntityInfo(3));

    EXPECT_CALL(meshFactory, CreateMesh())
        .Times(3);

    Entity* entity = gameFactory.CreateGameEntity(gameEntityUid);
}

MockItNow

This open-source C++ mocking framework written by Rory Driscoll takes a totally different approach from GoogleMock. Instead of requiring that all your mockable classes inherit from a virtual interface, it uses compiler support to insert some code before each call. This code can then call the mock and return to the test directly, without ever calling the real object.

From a technical point of view, it’s a very slick method of hooking up the mocks, but the main advantage of this approach is that it doesn’t force a virtual interface on classes that don’t need it. It also minimizes typing compared to GoogleMock. The only downside is that it’s very platform-specific implementation, and the version available only supports Intel x86 processors, although it can be re-implemented for PowerPC architectures.

Problems With Mocks

There is no doubt that mocks are a very useful tool. They allow us to test object interactions in our unit tests without involving lots of different classes. In particular, mock frameworks make using mocks even simpler, saving typing and reducing the time we have to spend writing tests. What’s not to like about them?

The first problem with mocks is that they can add extra unnecessary complexity to the code, just for the sake of testing. In particular, I’m referring to the need to have a virtual interface that objects are are going to be mocked inherit from. This is a requirement if you’re writing mocks by hand or using GoogleMock (not so much with MockItNow), and the result is more complicated code: You need to instantiate the correct type, but then you pass around references to the interface type in your code. It’s just ugly and I really resent that using mocks is the only reason those interfaces are there. Obviously, if you need the interface and you’re adding a mock to it afterwards, then there’s no extra complexity added.

If the complexity and ugliness argument doesn’t sway you, try this one: Every unnecessary interface is going to result in an extra indirection through a vtable with the corresponding performance hit. Do you really want to fill up your game code with interfaces just for the sake of testing? Probably not.

But in my mind, there’s another, bigger disadvantage to using mock frameworks. One of the main benefits of unit tests is that they encourages a modular design, with small, independent objects, that can be easily used individually. In other words, unit tests tend to push design away from object interactions and more towards returning values directly or modifying external data.

A mocking framework can make creating mocks so easy, to the point that it doesn’t discourage programmers from creating a mock object any time they think of one. And when you have a good mocking framework, every object looks like a good mock candidate. At that point, your code design is going to start looking more like a tangled web of objects communicating in complex ways, rather than simple functions without any dependencies. You might have saved some typing time, but at what price!

When to Use Mock Frameworks

That doesn’t mean that you shouldn’t use a mocking framework though. A good mocking framework can be a lifesaving tool. Just be very, very careful how you use it.

The case when using a mocking framework is most justified when dealing with existing code that was not written in unit testing in mind. Code that is tangled together, and impossible to use in isolation. Sometimes that’s third-party libraries, and sometimes it’s even (yes, we can admit it) code that we wrote in the past, maybe under a tight deadline, or maybe before we cared much about unit tests. In any case, trying to write unit tests that interface with code not intended to be tested can be extremely challenging. So much so, that a lot of people give up on unit tests completely because they don’t see a way of writing unit tests without a lot of extra effort. A mocking framework can really help in that situation to isolate the new code you’re writing, from the legacy code that was not intended for testing.

Another situation when using a mocking framework is a big win is to use as training wheels to get started with unit tests in your codebase. There’s no need to wait until you start a brand new project with a brand new codebase (how often does that happen anyway?). Instead, you can start testing today and using a good mock framework to help isolate your new code from the existing one. Once you get the ball rolling and write new, testable code, you’ll probably find you don’t need it as much.

Apart from that, my recommendation is to keep your favorite mocking framework ready in your toolbox, but only take it out when you absolutely need it. Otherwise, it’s a bit like using a jackhammer to put a picture nail on the wall. Just because you can do it, it doesn’t mean it’s a good idea.

Keep in mind that these recommendations are aimed at using mock objects in C and C++. If you’re using other languages, especially more dynamic or modern ones, using mock objects is even simpler and without many of the drawbacks. In a lot of other languages, such as Lua, C#, or Python, your code doesn’t have to be modified in any way to insert a mock object. In that case you’re not introducing any extra complexity or performance penalties by using mocks, and none of the earlier objections apply. The only drawback left in that case is the tendency to create complex designs that are heavily interconnected, instead of simple, standalone pieces of code. Use caution and your best judgement and you’ll make the best use of mocks.

This article was originally printed in the June 2009 issue of Game Developer.

Remote Game Editing

I’ve long been a fan of minimal game runtimes. Anything that can be done offline or in a separate tool, should be out of the runtime. That leaves the game architecture and code very lean and simple.

One of the things you potentially give up by keeping the game runtime to a minimum is an editor built in the game itself. But that’s one of those things that sounds a lot better than it really is. From a technical point of view, having an editor in the game usually complicates the code a huge amount. All of a sudden you need to deal with objects being created and destroyed randomly (instead of through clearly defined events in the game), and you have to deal with all sorts of crazy inputs and configurations.

The worse part though, is having to implement some sort of GUI editing system in every platform. Creating the GUI to run on top of the game is not easy, requiring that you create custom GUI code or try to use some of the OpenGL/DirectX libraries available. And even then, a complex in-game GUI might not be a big deal on a PC, but wait and try to use that interface on a PS3 or iPhone. After all, making games is already complicated and time-consuming enough to waste more time reinventing the widget wheel.

Remote game editing manages to keep a minimal runtime and allow you to quickly create native GUIs that run on a PC. It’s the best of both worlds, and although it’s not quite a perfect solution, it’s the best approach I know.

Debug Server

Miguel Ángel Friginal already covered the basics of the debug server, so I’m not going to get in details there.

The idea is that you run a very simple socket server on the game, listening in a particular port. This server implements the basic telnet protocol, which pretty much means that it’s a line-based, plain-text communication.

The main difference between my debug server and Miguel’s (other than mine is written in cross-platform C/C++ instead of ObjC), is that I’m not using Lua to execute commands. Using Lua for that purpose is a pretty great idea, but goes against the philosophy of keeping the runtime as lean and mean as possible.

Instead, I register variables with the server by hand. For each variable, I specify its memory address, it’s type, any restrictions (such as minimum and maximum values), and a “pretty name” to display in the client. Sounds like a lot of work, but it’s just one line with the help of a template:

registry.Add(Tweak(&plantOptions.renderGloss, "render/gloss", "Render gloss"));
registry.Add(Tweak(&BouquetParams::FovY, "bouquet/fov", "FOV", Pi/32, Pi/3))

And yes, if I were to implement this today, I would probably get rid of the templates and make it all explicit instead (ah, the follies of youth 🙂

TweakUtils::AddBool(registry, &plantOptions.renderGloss, "render/gloss", "Render gloss");
TweakUtils::AddFloat(registry, &BouquetParams::FovY, "bouquet/fov", "FOV", Pi/32, Pi/3);

The debug server itself responds to three simple commands:

  • list. Lists all the variables registered in the server.
  • set varname value. Sets a value.
  • print varname. Gets the value for that variable.

For example, whenever the server receives a set command, it parses the value, verifies that it’s within the acceptable range, and applies it to the variable at the given memory location.

Telnet Clients

telnet.png
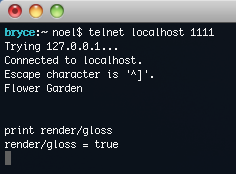
Because we used the standard telnet protocol, we can start playing with it right away. Launch the game, telnet into the right port, and you can start typing away.

However, most telnet clients leave much to be desired for this. They all rely on the history and cursor manipulation being handled by the shell they assume you’re connected to. Here we aren’t connected to much of anything, but I’d like to be able to push up arrow and get my last command, and be able to move to the beginning of the line or the previous word like I would do in any text editor. The easiest solution I found for that was to use a telnet client prepared for that kind of thing: A MUD client! Just about any will do, but one that works well for me is Atlantis.

So far, we’ve implemented the equivalent of a FPS console, but working remotely. And because the code is fully portable, our game can be in just about any platform and we can always access it from our PC. Not just that, but we can even open multiple simultaneous connections to various development devices if you need to run them all at once.

Custom Clients

Game parameter tweaking is something that is OK through a text-based console, but really comes into its own when you add a GUI. That’s exactly what we did at Power of Two Games. We created a generic GUI tool (based on WinForms since we were on Windows at the time), that would connect to the server, ask for a list of variables, and generate a GUI on the fly to represent those variables. Since we knew type and name of each variable, it was really easy to construct the GUI elements on the fly: A slider with a text field for floats and ints, a checkbox for bools, four text fields for vectors, and even a color picker for variables of the type color.

It worked beautifully, and adjusting different values by moving sliders around was fantastic. We quickly ran into two problems through.

The first one is that we added so many different tweaks to the game, that it quickly became unmanageable to find each one we wanted to tweak. So, in the spirit of keeping things as simple as possible (and pushing the complexity onto the client), we decided that the / symbol in a name would separate group name and variable name. That way we could group all related variables together and make everything usable again.

The second problem was realizing that some variables were changing on the runtime without us knowing it on the client. That created weird situations when moving sliders around. We decided that any time a registed variable changes on the server, it should notify any connected clients. That worked fine, but, as you can imagine, it became prohibitively expensive very quickly. To get around that, we added a fourth command: monitor varname. This way clients need to explicitly register themselves to receive notifications whenever a variable changes, and the GUI client only did it for the variables currently displayed on the screen.

tweaker.png

During this process, it was extremely useful to be able to display a log console to see what kind of traffic there was going back and forth. It helped me track down a few instances of bugs where changing a variable in the client would update it in the server, sending an update back to the client, which would send it again back to the server, getting stuck in an infinite loop.

You don’t need to stop at a totally generic tool like this either. You could create a more custom tool, like a level editor, that still communicates with the runtime through this channel.

Flower Garden Example

For Flower Garden, I knew I was going to need a lot of knobs to tweak all those plant DNA parameters, so I initially looked into more traditional GUI libraries that worked on OpenGL. The sad truth is that they all fell way short, even for development purposes. So I decided to grab what I had at hand: My trusty tweaking system from Power of Two Games.

I’m glad I did. It saved a lot of time and scaled pretty well to deal with the hundreds of parameters in an individual flower, as well as the miscellaneous tweaks for the game itself (rendering settings, infinite fertilizer, fast-forwarding time, etc).

Unfortunately, there was one very annoying thing: The tweaker GUI was written in .Net. Sure, it would take me a couple of days to re-write it in Cocoa (faster if I actually knew any Cocoa), but as an indie, I never feel I can take two days to do something tangential like that. So instead, I just launched it from VMWare Fusion running Windows XP and… it worked. Amazingly enough, I’m able to connect from the tweaker running in VMWare Fusion to the iPhone running in the simulator. Kind of mind boggling when you stop and think about it. It also connects directly to the iPhone hardware without a problem.

VMWare Fusion uses up a lot of memory, so I briefly looked into running the tweaker client in Mono. Unfortunately Mono for the Mac didn’t seem mature enough to handle it, and not only was the rendering of the GUI not refreshing correctly, but events were triggered in a slightly different order than in Windows, causing even more chaos with the variable updates.

Here’s a time-lapse video of the creation of a Flower Garden seed from the tweaker:

Drawbacks

As I mentioned earlier, I love this system and it’s better than anything else I’ve tried, but it’s not without its share of problems.

Tweaking data is great, but once you find that set of values that balances the level to perfection… then what? You write those numbers down and enter them in code or in the level data file? That gets old fast. Ideally you want a way to automatically write those values back. That’s easy if the tool itself is the editor, but if it’s just a generic tweaker, it’s a bit more difficult.

One thing that helped was adding a Save/Load feature to the tweaker GUI. It would simply write out a large text-based file with all the variables and their current values. Whenever you load one of those, it would attempt to apply those same values to the current registered variables. In the end, I ended up making the Flower Garden offline seed file format match with what the tweaker saved out, so that process went pretty smoothly.

Another problem is if you want lots of real-time (or close to real time) updates from the server. For example, you might want to monitor a bunch of data points and plot them on the client (fps, memory usage, number of collisions per frame, etc). Since those values change every frame, it can quickly overwhelm the simple text channel. For those cases, I created side binary socket channels that can simply send real-time data without any overhead.

Finally, the last drawback is that this tweaking system makes editing variables very easy, but calling functions is not quite as simple. For the most part, I’ve learned to live without function calls, but sometimes you really want to do it. You can extend the server to register function pointers and map those to buttons in the client GUI, but that will only work for functions without any parameters. What if you wanted to call any arbitrary function? At that point you might be better off integrating Lua in your server.

Future Directions

This is a topic I’ve been interested in for a long time, but the current implementation of the system I’m using was written 3-4 years ago. As you all know by now, my coding style and programming philosophy changes quite a bit over time. If I were to implement a system like this today, I would do it quite differently.

For all I said about keeping the server lean and minimal, it could be even more minimal. Right now the server is receiving text commands, parsing them, validating them, and interpreting them. Instead, I would push all that work on the client, and all the server would receive would be a memory address, and some data to blast at that location. All of that information would be sent in binary (not text) format over a socket channel, so it would be much more efficient too. The only drawback is that we would lose the ability to connect with a simple telnet client, but it would probably be worth it in the long run.

This post is part of iDevBlogADay, a group of indie iPhone development blogs featuring two posts per day. You can keep up with iDevBlogADay through the web site, RSS feed, or Twitter.

Nitty Gritty Unit Testing

It’s one thing to see someone drive a car and have a theoretical understanding of what the pedals do and how to change gears. It’s is a completely different thing to be able to drive a car safely on the street. There are some activities that require many small details and some hands-on experience to be able to execute them successfully.

The good news is that unit testing is a lot simpler than driving a standard shift, but there are a lot of small details you need to get right to do it successfully. Even after reading about unit testing and being convinced of its benefits, programmers are often not sure how to get started. This month’s column is not going to try to convince you of the many benefits of unit testing (I hope you are already convinced), but rather, describe some very concrete tips to help you get started right away.

Goals of Unit Testing

There are many different reasons to write unit tests:

  • Correctness testing. Checking that the code behaves as designed.
  • Boundary testing. Checking that the code behaves correctly in odd or boundary situations.
  • Regression testing. Checking that the behavior of the code doesn’t change unintentionally over time.
  • Performance testing. Checking that the program meets certain minimum performance or memory constraints.
  • Platform testing. Checking that the code behaves the same across multiple platforms.
  • Design. Tests provide a way to advance the code design and architecture. This is usually referred as Test-Driven Development (TDD).
  • Full game or tool testing. Technically this is a functional test, not a unit test anymore because it involves the whole program instead of a small subset of the code, but a lot of the same techniques apply.

Some developers use unit tests only for one of the reasons listed above, while others use many kinds of tests for a variety of different reasons. It’s important to recognize that because there are so many different uses for unit tests, no single solution is going to fit everybody. The ideal setup for some of those situations is going to be slightly different than for others. The basics are the same for all of them though.

When working with unit tests, these are our main goals:

  • Spend as little time as possible writing a new test.
  • Be notified of failing tests, and see at a glance which ones failed and why.
  • Trust our tests. Have them be consistent from run to run and robust in the face of bad code.

Testing Framework

lack_of_tests.jpgMost of us have created one-off programs in the past to test some particularly complicated code. It’s usually a quick command line program that runs through a bunch of cases and asserts after each one that the results were correct. That’s the most bare-bones way of creating unit tests.

Unfortunately, it’s also a pain and it misses on most of the unit-testing goals described in the previous section: creating a new program just for that is a pain, we have to go out of our way to run the tests, and it usually gets out of date faster than the latest Internet meme. That is in part why a lot of programmers have an initial aversion to writing unit tests.

If you’re considering writing even a small unit test, you should use a unit-testing framework. A unit-testing framework removes all the busy work from writing unit tests and lets you spend your time on the logic of what to test. This doesn’t mean that the framework writes the tests for you. Be very wary of any tool that claims to do that! No, a unit-testing framework is simply a small library that provides all the glue for running unit tests and reporting the results. Sorry, you still need to use your brain and do (some of) the typing.

A quick search will reveal plenty of unit-testing frameworks to choose from for your language of choice, and most of them are free and open source so you can rely on them and modify them to suit your needs. For C/C++ and game development, I strongly recommend starting with UnitTest++. Charles Nicholson and I wrote that framework a few years ago specifically with games and consoles in mind. Many game teams have adopted it for their games and tools, and it has been used on lots of different game platforms including current and last generation consoles, Windows, Linux, and Mac PCs, and even on the iPhone. In most situations, it should be a straight drop-in to your project and you’re up and running.

If you end up using a different testing framework, or even if you roll your own, the techniques described here still apply, even if the syntax is slightly different.

Hello Tests

Writing your first test is easy as pie:

#include <UnitTest++.h>

TEST(MyFirstTest)
{
    int a = 4;
    CHECK(a == 4);
}

To run it you need to add the following line to your executable somewhere. We’ll talk more about the physical organization of tests in a moment.

int failedCount = UnitTest::RunAllTests();

Done! Easy, wasn’t it? When you compile and run the program you should see the following output:

Success: 1 test passed.
Test time: 0.00 seconds.

Let’s add a failing test:

TEST(MyFailingTest)
{
    int a = 5;
    CHECK(a == 4);
}

Now we get:

/fullpath/filename.cpp:17: error: Failure in MyFailingTest: a == 4
FAILURE: 1 out of 2 tests failed (1 failures).
Test time: 0.00 seconds.

That’s great, but if we’re going to diagnose the problem, we probably need to know the value of the variable a, and all the test is telling us is that it’s not 4. So instead, we can change the CHECK statement to the following:

TEST(MyFailingTest)
{
    int a = 5;
    CHECK_EQUAL(4, a);
}

And now the output will be

/fullpath/filename.cpp:17: error: Failure in MyFailingTest: Expected 4 but was 5
FAILURE: 1 out of 2 tests failed (1 failures).
Test time: 0.00 seconds.

Much better. Now we get both the error information and the value of the variable under test. Virtually all unit-testing frameworks include different types of CHECK statements to get more information when testing floats, arrays, or other data types. You can even make your own CHECK statement for your own common data types such as colors or lists.

As a bonus, if you’re using an IDE, double-clicking on the test failure message should bring you automatically to the failing test statement.

When To Run

When to run unit tests will depend on what is being tested and how long it takes to do so. In general, the more frequently you run the tests, the better. The sooner you get feedback that something went wrong, the easier it will be to fix. Maybe even before it was checked in and it spread to the rest of the team. On the flip side, realistically, building and running a set of unit tests takes a certain amount of time, so it’s important to find the right balance between feedback frequency and time spent waiting for tests.

At the very least, all tests should run once a day, during the nightly build process in your build server (You have a build server, don’t you? If not, run over and read this column in the August 2008 issue). It doesn’t matter how long they take or how how many different projects you need to run. Just add them to the build script, and hook their output into the build results.

On the other extreme, you can build your tests every time you build the project and execute them as a postbuild step. That way, any time you make a change to a project, all tests will execute and you’ll see if anything went wrong. This is a great approach, but I wouldn’t recommend it if tests add more than a couple of seconds to the incremental build time, otherwise, they’ll be slowing you down more than they help.

For most developers, some approach in the middle will make most sense. For example, take a small, fast subset of tests that are more likely to break, and run those with every build. Whenever any code is checked in to version control, the build server can run those tests plus a few more, slower ones. And finally, at night, you can bring out the big guns and run those really long, really thorough ones that take a few hours to complete. You can separate those tests into different projects, or, if your framework supports them, into different test suites, which allow you to decide which sets of tests to execute at runtime.
Reporting Results

If a unit test fails and nobody notices, is it really an error? Just running the tests isn’t good enough. We have to make sure that someone sees the failure it and fixes the problem.

Most unit-testing frameworks will let you customize how you want the failure errors to be reported. By default they will probably be sent to stdout, but you can easily customize the framework to send them to debug log streams, save to a file, or upload them to a server.

Even more important than the actual error messages is detecting whether there were any failures. After running all the tests, there is usually some way to detect how many tests failed. The program that was running the tests can detect any failures, print an error message, and exit with an error code. That error code will propagate to the build server and trigger a build failure. Hopefully by now alarm sounds are going off across the office and someone is on his way to fix it.

Project Organization

When people start down the unit test path, they often struggle to figure out how to physically lay out the unit tests. In the end, it really doesn’t matter too much as long as it makes sense to you, the final build doesn’t contain any tests, and they’re still easy to build and run.

My personal preference is to keep unit tests separate from the rest of the code. Usually I end up creating one file of tests for every cpp file. So FirstPersonCameraController.h and .cpp have a corresponding TestFirstPersonCameraController.cpp. Since I use this convention regularly throughout all of my code, I have a custom IDE macro to toggle between a file and its corresponding test file. I also put all the tests in a separate subdirectory to keep them as physically separate as possible.

I prefer to break up my code into several static libraries for each major subsystem: graphics, networking, physics, animations, etc. Each of those libraries has a set of unit tests, but instead of compiling them into the library, I create a separate project that creates a simple executable program. That project contains all the unit tests and links against the library itself, and in its main entry point it just calls the function to runs all unit tests and returns the number of failures. This keeps the tests separate from the library, but still very easy to build.

If all your code is organized into libraries, and your game is just a collection of libraries linked together, that’s all you need. Most games and tools, however, have a fair amount of code that you might want to test in the project itself. Since the game is an executable, you can’t easily link against it from a different project like we did before. In this case, I build the unit tests into the game itself, and I optionally call them whenever a particular command-line parameter like -runtests is present. Just make sure to #ifdef out all the tests in the final build.

Multiplatform Testing

Running the tests on the PC where you build the code is very straightforward. But unless you’re only creating games and tools for that platform, you will definitely want to run your tests on different platforms as well. Unit tests are an invaluable tool for catching slight platform inconsistencies caused by different compilers, architecture idiosyncrasies, or varying floating point rules.

Unfortunately, running unit tests on a different platform from your build machine is usually a bit more involved and not nearly as fast as doing it locally. You need to start by compiling the tests for the target platform. This is usually not a problem since you’re already building all your code for that platform, and hopefully your unit testing framework already supports it. Then you need to upload your executable with the tests and any data required to the target platform and run it there. Finally, you need to get the return code back to detect if there were any failures. This is surprisingly the trickiest part of the process with a lot of console development kits. If getting the exit code is not a possibility, you’ll need to get creative by parsing the output channel, or even waiting for a notification on a particular network port.

Some target platforms are more limited than others in both resources and C++ support. One of the features that makes UnitTest++ a good choice for games is that it requires minimal C++ features (no STL) and it can be trimmed down even further (no exceptions or streams).

For example, running unit tests on the PS3 SPUs was extremely useful, but it required stripping the framework down to the minimum amount of features. It was also tricky being able to fit the library code plus all the tests in the small amount of memory available. To get around that, we ended up changing the build rules for the SPUs so each test file created its own SPU executable (or module). We then wrote a simple main SPU program that would load each module separately, run its tests, keep track of all the stats, and finally report them.

Running a set of unit tests on the local machine can be an almost instant process, but running them on a remote machine is usually much slower, and can take up to 10 or 20 seconds just with the overhead of copying them and launching the program remotely. For this reason, you’ll want to run tests on other platforms less frequently.

No Leaking Allowed

Finally, if you’re going to have this all this unit testing code running on a regular basis, you might as well get as much information out of it as possible. I have found it invaluable to keep track of memory leaks around the unit test code.

You’ll have to hook into your own memory manager, or use the platform-specific memory tracking functions. The basic idea is to get a memory status before running the tests, and another one after all the tests execute. If there are any extra memory allocations, that’s probably a leak. In that case, you can report it as a failed build by returning the correct error code.

Watch out for static variables or singletons that allocate memory the first time they’re used. They might be reported as memory leaks even though it wasn’t what you were hoping to catch. In that case, you can explicitly initialize and destroy all singletons, or, even better, not use them at all, and keep your memory leak report clean.

You’re now armed with all you need to know to set up unit tests into your project and build pipeline. Grab a testing framework and get started today.

This article was originally printed in the May 2009 issue of Game Developer.